- Farm & Garden
- Pumps & Motors
- Food Processing
- Workshop, DIY & MRO
- Lab & Measuring Tools


Brand: Generic ( Made in India )
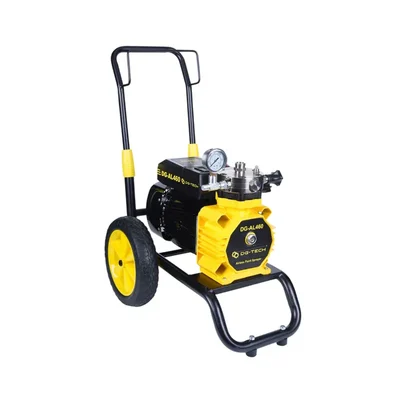
DG-Tech 2000 W Airless Paint Sprayer, 3 LPM Max. Volume Flow
SKU: TI-D2-46081 Estimated Delivery By: Jul 23 - Jul 25


MRP : ₹36500 ₹29599
19% OFF!
Estimated Delivery By: Jul 23 - Jul 25 Easy Return
& Refund
& Refund
Quality
Assurance
Assurance
Trusted
Delivery
Delivery
After Sales
Assistance
Assistance
Buyer
Protection
Protection
₹29599 (Including GST)
MRP : ₹36500
19% OFF!
Get Extra ₹444 OFF on Prepaid Orders
Short Description
DG-Tech 2000W Airless Paint Sprayer
1000-3000psi Pressure Range
Country of origin: India
Specifications
- Brand: Generic ( Made in India )
- Weight (Approx.) : 31 kg
- Voltage : 220V~50Hz
- Motor Rating : 2000W
- Hose Close Nipple : 1/4"
- Max. Volume Flow : 3L/Min
- Range of Pressure : 1000-3000psi
- Hose Length : 13 Meters
Description
The DG-Tech Airless Paint Sprayer 460 is a high-capacity diaphragm sprayer designed for maximum efficiency and uninterrupted performance in heavy-duty painting work. The motor is preferably designed to be big with 2000W of power and finishes comfortably at 3L/min of flow rate, making this unit a great choice for high speed, highly reliable smooth finishing for large-scale projects.
Features
:- 2000W Powerful Motor : Designed for long hours of operation in harsh areas.
- Diaphragm Pump Technology : Ensures smooth operation by reducing maintenance and inconsistencies in pressure.
- Max Flow Rate: 3L/min : Covers large surface areas fast and accurately.
- Adjustable Pressure : 1000-3000 PSI: High precision in pressure control for a great variety of materials and applications.
- 1/4" Hose Close Nipple : Standard fitting for easy hose attachment and inter-compatibility.
- Voltage : 220V~50Hz : Running on a standard power supply, useful at job sites and workshops.
- Airless Spraying System : Less overspray results in cleaner, professional-grade coatings.
Applications
:- Large-Scale Commercial & Residential Painting: Covers wide wall and ceiling surfaces efficiently, giving rise to less labor and time.
- Construction & Renovation Projects: Application of primers, emulsions, and protective coatings during structural works.
- Industrial Coating: Large equipment, warehouses, and metal structures require thick coatings evenly applied.
- Furniture and Wood Finishing: Give the best smooth finish for wood surfaces for furniture, cabinets, and fixtures.
- Professional Painters and Contractors: It is built for application use every day with high volume with almost no downtime.
Usage
:Usage
Setup before spraying
- Place the sprayer on stable ground near the paint container.
- Connect the suction (inlet) hose into the paint (or coating) container.
- Connect the high‑pressure hose to the sprayer and to the spray gun.
- Ensure the spray tip / nozzle is properly installed on the gun.
- Set the prime/flush/valve (if your unit has one) so that fluid can be drawn in.
- Turn on the power supply and start the motor (switch ON). Let the pump draw in paint until paint comes out at the gun (or until prime is complete).
- Lock the gun’s safety (if present) before adjusting anything.
- Adjust the pressure control knob slowly until a steady, fine spray pattern is achieved. Do not run at higher pressure than needed.
- Test on a scrap surface (e.g. cardboard) to ensure spray pattern, atomization, and flow are correct.
Spraying technique
- Hold the spray gun perpendicular and parallel to the surface at a consistent distance (often 20–30 cm, but depends on paint type).
- Move the gun in smooth, overlapping strokes (e.g., 50% overlap) to achieve even coverage.
- Do not start the trigger until the gun is in front of the work surface; release trigger after leaving the surface.
- Avoid jerky starts or stops - maintain even motion.
- If clogs occur, relieve pressure and flush.
Pressure relief procedure (before servicing / cleaning)
- Always relieve pressure before opening the system or touching any fluid path parts:
- Turn off the sprayer (power OFF).
- Lock the gun trigger safety.
- Open prime / drain valves (if equipped) or open a bleed / relief port.
- Trigger the gun to release residual pressure (point into a safe waste bucket).
- Only after confirming pressure is relieved, you may disconnect hoses, remove filters, etc.
Maintenance
After each use (daily / every spray session)
- Clean thoroughly immediately after finishing. Do not allow paint to dry inside.
- Use a solvent or cleaning fluid appropriate for the type of paint (water for water‑based paints, mineral spirits or solvent for oil-based) to flush the system.
- Flush until clean fluid appears at the gun. Then, with the prime valve open (if applicable), allow fluid to circulate briefly.
- Disassemble and clean filters, screens, tip/nozzle, gun parts, suction tube, drains, etc.
- Wipe down exterior surfaces (hose, body, gun) with a cloth soaked in cleaning solvent (not immersing the entire unit).
- Inspect hoses, fittings, seals, and connections for damage, wear, or leaks.
Periodic maintenance (weekly / after set hours)
- Check and clean or replace filters / screens in the pump, gun, suction hose, etc.
- Inspect pump seals, O‑rings, gaskets, valves and packing — if any wear or leakage is seen, replace them.
- Lubricate packing or pump parts as recommended (check manufacturer manual). Some units require a small amount of lubricant or special oil in the packing gland.
- If the unit uses replaceable tips / nozzles, replace them when worn (wore tips lead to poor spray, excessive waste, and higher pressure). Many manuals recommend replacing tips after certain coverage (e.g. 4,000‑5,000 m²) or when spray pattern degrades.
- For units with electric motors (brush motors), check brushes, commutator, and clean out dust. Replace brushes when they become too short (as per manufacturer guidance).
- Scribd
- Blow out dust from motor housing or ventilation ports using compressed air (with motor off). Be cautious not to damage wiring or parts.
Long‑term storage
- After final cleaning and flushing, run some protective oil (or light lubricant) through the pump (by running the sprayer with prime flow) so internal components are coated to prevent corrosion or sticking.
- Scribd
- Disconnect and store hoses, gun, and accessories in a clean, dry place.
- Cover or cap all fluid inlets/outlets to prevent ingress of dust.
- Periodically (once in a while) run a little fluid (or oil) through to ensure internal parts stay free.
Troubleshooting / common issues
- Loss of pressure / weak spray: could be due to clogged filters, worn tip, air leak in suction hose, worn pump seals.
- No paint flow: check suction hose, prime valve, suction strainers, ensure paint is fluid enough.
- Irregular spray / spatters: tip is worn or damaged, or paint not properly filtered.
- Leaks: check seals, O-rings, tighten fittings (but don’t overtighten).
- Motor not running: check power supply, cord, switch, brushes.
Ask AI

 AI-generated answers may be inaccurate. Double-check critical facts.
 Questions & Answers (0)

Select attribute